 |
| Villa Leone's kitchen has a Old Stone Sink. AND not only that but as of today, I can proudly proclaim that One Half of the Villa's kitchen is completely done! I have to say that out loud because I can't believe it myself! This has been an interesting journey to say the least. It has entailed building a second small hall enclosure on the main floor of this Greenleaf Willowcrest kit, prior to constructing a proper kitchen; which meant building from the back, which is the front face of the house as I built forwards towards the open end. such a lot of thinking and pre-planning WHEW!  Yet even though it has been extra challenging, I quite enjoy that sense of realism which comes with viewing rooms behind rooms and down passageways. But Since my 'willy-wonka' construction techniques are not always square; *sigh* I am gaining LOTS of experience on how to discreetly "fudge" on my "mis-measured measurements" *another sigh* so that all will still look right and I'm not done yet. In any case I thought I would fill you in on the completed Right Side of Villa Leone's kitchen which I have to admit ♥I'm Very HAPPY with ♥ ♥ *** First let me say that after a very heated discussion between me and myself and I, I decided to change the kitchen wallpaper so that it was completely different from that in the Service Hall. I had previously determined to use a bolder print of a French Aubusson carpet as a backsplash behind the stove, yet after I'd changed the basic wallpaper that particular rug print no longer worked. After much searching through all of my paper files, I managed to find an substitute picture of a rug pattern with muted colors in greens, sepia, and golden tones, which I made multiple color copies of, then cut and glued the paper to fit around the lower 2/3's of all 3 kitchen walls. The rug print was then sealed and aged and then sealed again. The end result is that the kitchen walls appear very faded and "OLD WORLD" I knew I wanted even more of that same "Old/Ancient" look for the proposed stone sink which would be made to measure to fit under the arched kitchen window. I followed and slightly modified Lea Frisoni's kitchen sink instructions from her FABULOUSLY POPULAR "BIG BOOK OF A MINIATURE HOUSE" I built the basic form from scraps of used balsa wood, and skinny sticks. Mine is a BIG sink so it needed some rather hefty supports. I found 2 wooden corbel gathering dust in my stash and glued them to the base of the sink box. |


 |
| I sealed the wood with an All Purpose water-based sealer. When that was dry, I coated the wood with a thin layer of wall-patch as suggested in Lea's book. |


 |
| This is what the sink looked like when the wall-patch had dried. I gave it a light sanding, followed by and overall spray of Matte Acrylic sealer. |
 |
| Although, I could have left the sink as is, I decided that it was too Bright against the muted walls of the kitchen. After digging through my paints supplies, I found a jar of a gritty textured paint which I watered down and brushed over the entire sink unit- top, sides and bottom. |


 |
| After the paint had dried, I gave it a light sanding and another light spray of the Matte Sealer, then painted it again- this time with a mix of POWDERED CHALKS AND WATER |

 |
| It took a few tries before I was satisfied with the color of the stone. I gave it another light spray to seal the chalks. Then to accentuate the texture with some additional highlights, I lightly dry-brushed sections of it with white acrylic chalkboard paint. The photo below gives you the opportunity to clearly see the kitchen wallpapers, as well as the FINISHED SINK at this stage everything except the paper was being held onto the walls with generous blobs of BluTac call it- commitment phobia! |
 |
| By now, I was beginning to get a better feel for the personality of the room even though all I could see was a VERY BIG SINK which I needed to get finished. |
 |
| Because the underside was fully exposed, I felt it needed a drain-pipe. I made one from a bendy straw, metal washers, eyelets and a snap fastener. Once the pipe was painted black, it was glued under the sink and aged. |
 |
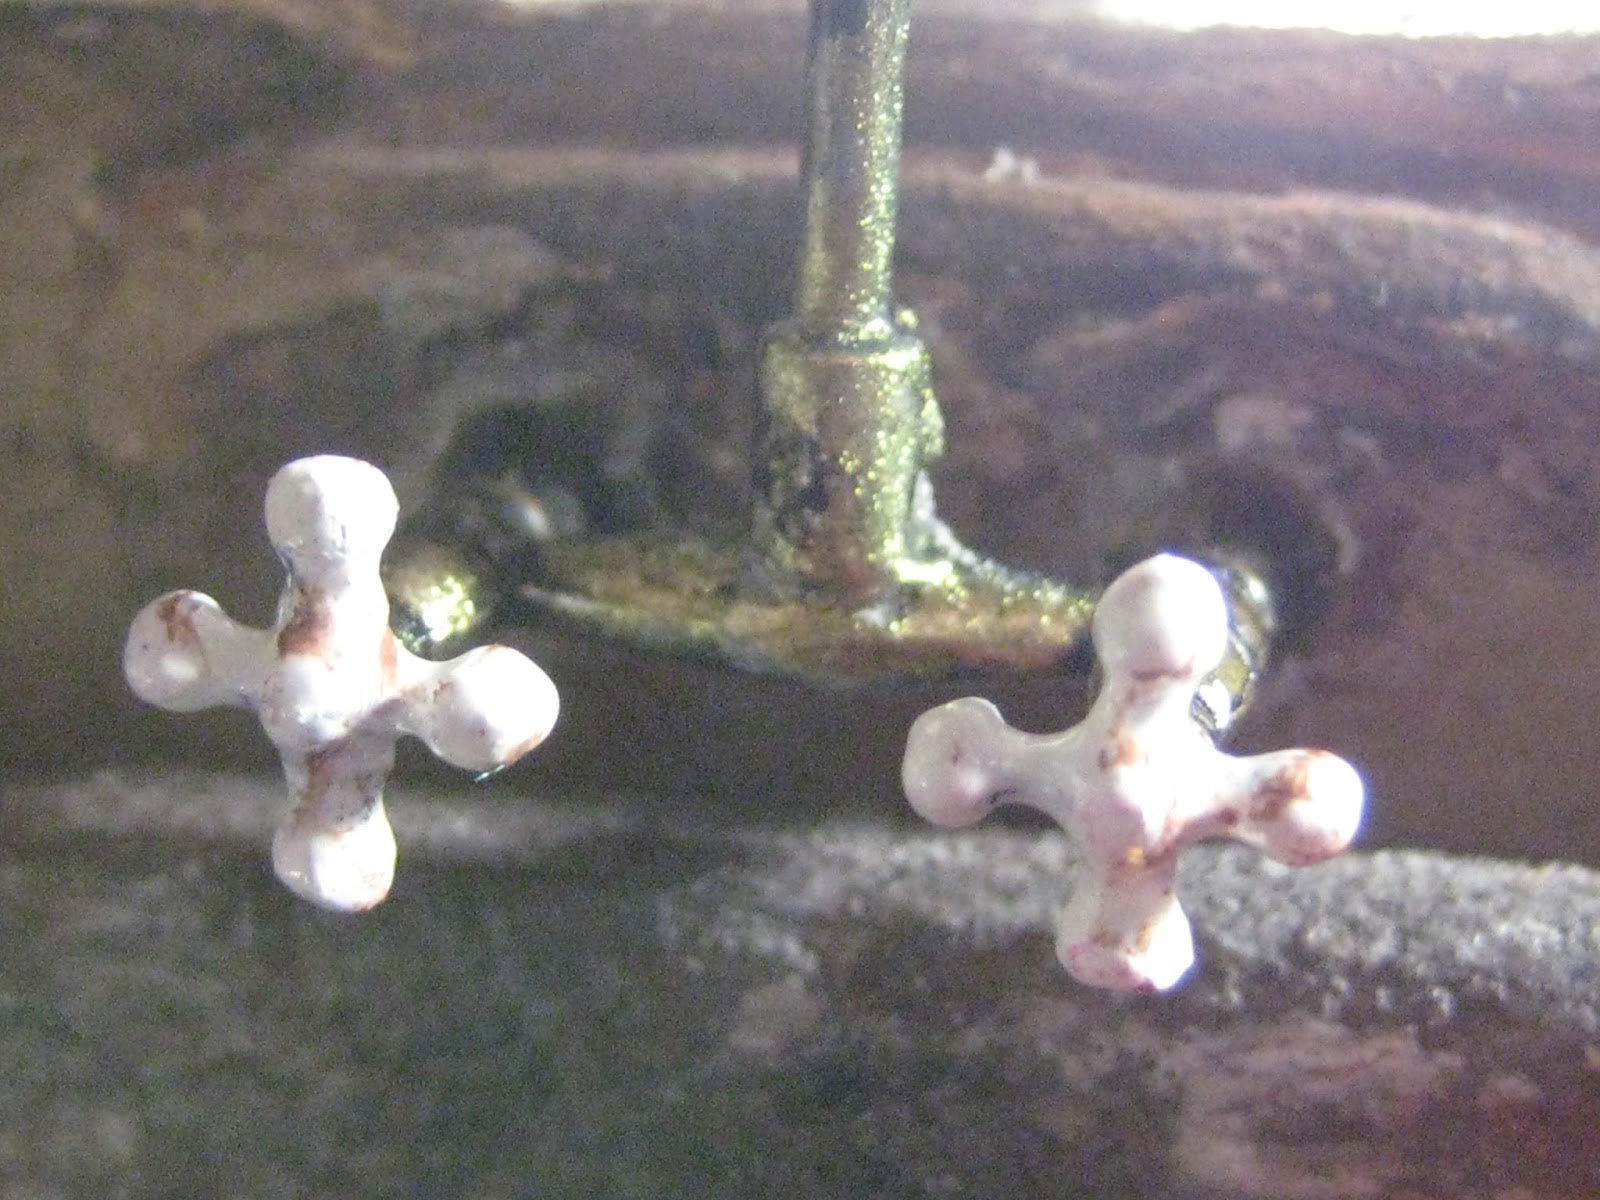
| For the sink faucet, I needed something which would extend forward out from the kitchen wall and over the sink. Initially I was planning to make a set but then I FOUND the plumbing unit I'd purchased last year at the Seattle Show. *Hooray!!!* They were originally meant to stand upright on top of the counter, soooooo I snipped off the original faucet from between the taps, turned the plumbing on its side and used a metal file to flattened and smooth the base for a new spout connection between the taps. I fashioned the new water spout from lead free soldering wire, then I glued on a tiny metal bead spacer to its base, added a tiny slice of plastic Q-tip which was slipped over the end and glued it to the head of the spout. I painted the entire unit with an "old brass"colored nail polish to match the rest of the plumbing fixture, followed by a clear gloss glaze with a touch of turquoise blue applied sparingly for corrosion. The taps were painted with white nail polish and more clear gloss glaze which I lightly aged with brown shoe polish. |
 |
 |
 |
| With the sink made, it was time to make it look usable. I was concerned that the wide drain would swallow whole whatever got too close to it - even a tomato! So to be on the safe side I made a plug. It is a section of a wood turning with a small jump-ring and a tiny gold chain glued to the top of the plug and then to the underside of the faucet. I was satisfied with the plug and felt all was moving along smoothly UNTIL I tried the sink on on the wall between an old chest of drawers and the Weston Butcher block- UNFORTUNATELY since you could no longer see the supports underneath, MY HEAVY STONE SINK APPEARED TO BE FLOATING ON AIR! *sigh* Soooooooo, to visually anchor the sink to the floor, I made a skirt for it. I Mod Podged a leftover scrap of the photocopied print used for the walls, onto some very fine cotton fabric. After soaking and removing the paper backing, I sprayed the fabric transfer with more of that MATTE ACRYLIC SPRAY, and when that was dry, I sewed a rod pocket along the top, gathered the stiffened fabric to create folds, inserted a metal rod and then glued the rod to the stone supports under the sink. Too bad that it hides the plumbing and the corbels BUT hey- you win some and you lose sight of some! Below you can see how the sink looks wearing it's new skirt. |
 | ||||
Now I shall tell you about the kitchen lighting. I found a old light fixture which I had made some years ago using an old gum ball container, buttons, beads, paper, and assorted jewelry findings. I painted over its black paint with a patina green chalk board paint, and brushed a thick layer of white school glue over the "glass" insert to bulk it up

Currently, the lamp is still stuck to the kitchen ceiling with
Blu Tac.
I won't glue it permanently to the ceiling until I've decided
on how to finish the LEFT SIDE of the kitchen, which ultimately will determine the final position of the ceiling fixture.
In the meantime,
I tried to make some tomatoes for the sink
using my old nemesis-
FIMO!
I combined 2 youtube tutorials to make them
using
SUGAR CHARMS SHOP
https://www.youtube.com/watch?v=rhhqD0_G9u4 for mixing the colors and getting the shapes and
JOANNE'S MINIS
https://www.youtube.com/watch?v=mOcpohwx37c for the method of making the green tops and finishing them. My fimo tomatoes turned out okay; I'm still making them since I'm not entirely happy; striving for more realistic results. nevertheless, when they're grouped in a bowl they look pretty good;
|


however
they look Even BETTER from AFAR! :D
they look Even BETTER from AFAR! :D
 |
| Janine's market basket is full of fresh vegetables which are also awaiting their turn in the sink |
 |
| The green beans were rolled out from the left over green clay which I'd used for the tomato tops; they were much more fun and easier to make than the tomatoes! And last but not least, for around the sink window, I made 5 rustic shelves from assorted craft sticks. I inserted brass pins along the undersides of the shelves from which to hang a variety of foods and kitchen equipment. I deliberately hung the shelves high so that the items on them wouldn't look cramped and/or congested. |
 |
| Once the shelves where firmly glued to the wall, then I began sorting through my stockpile of STUFF to dress them up. I had been thinking about doing this for A LONG TIME so I already had a loose plan in my mind of how I thought the shelves should be filled. |

 |
 |
I'll definitely need a folding step ladder
to reach the pots on the top
but I might already have one
SOMEWHERE hiding in my stash  The garlic and onion braids were made by my friend Fatima and the copper saucepan hanging between the onions and the garlic was a gift from Linda Park The individual garlic bulbs displayed in the pottery bowl, were made by me.   |
 |
| The set of blue and white kitchen canisters with Italian labels are from Carrie Lavender of A LAVENDER DILLY https://www.etsy.com/ca/shop/ALavenderDilly 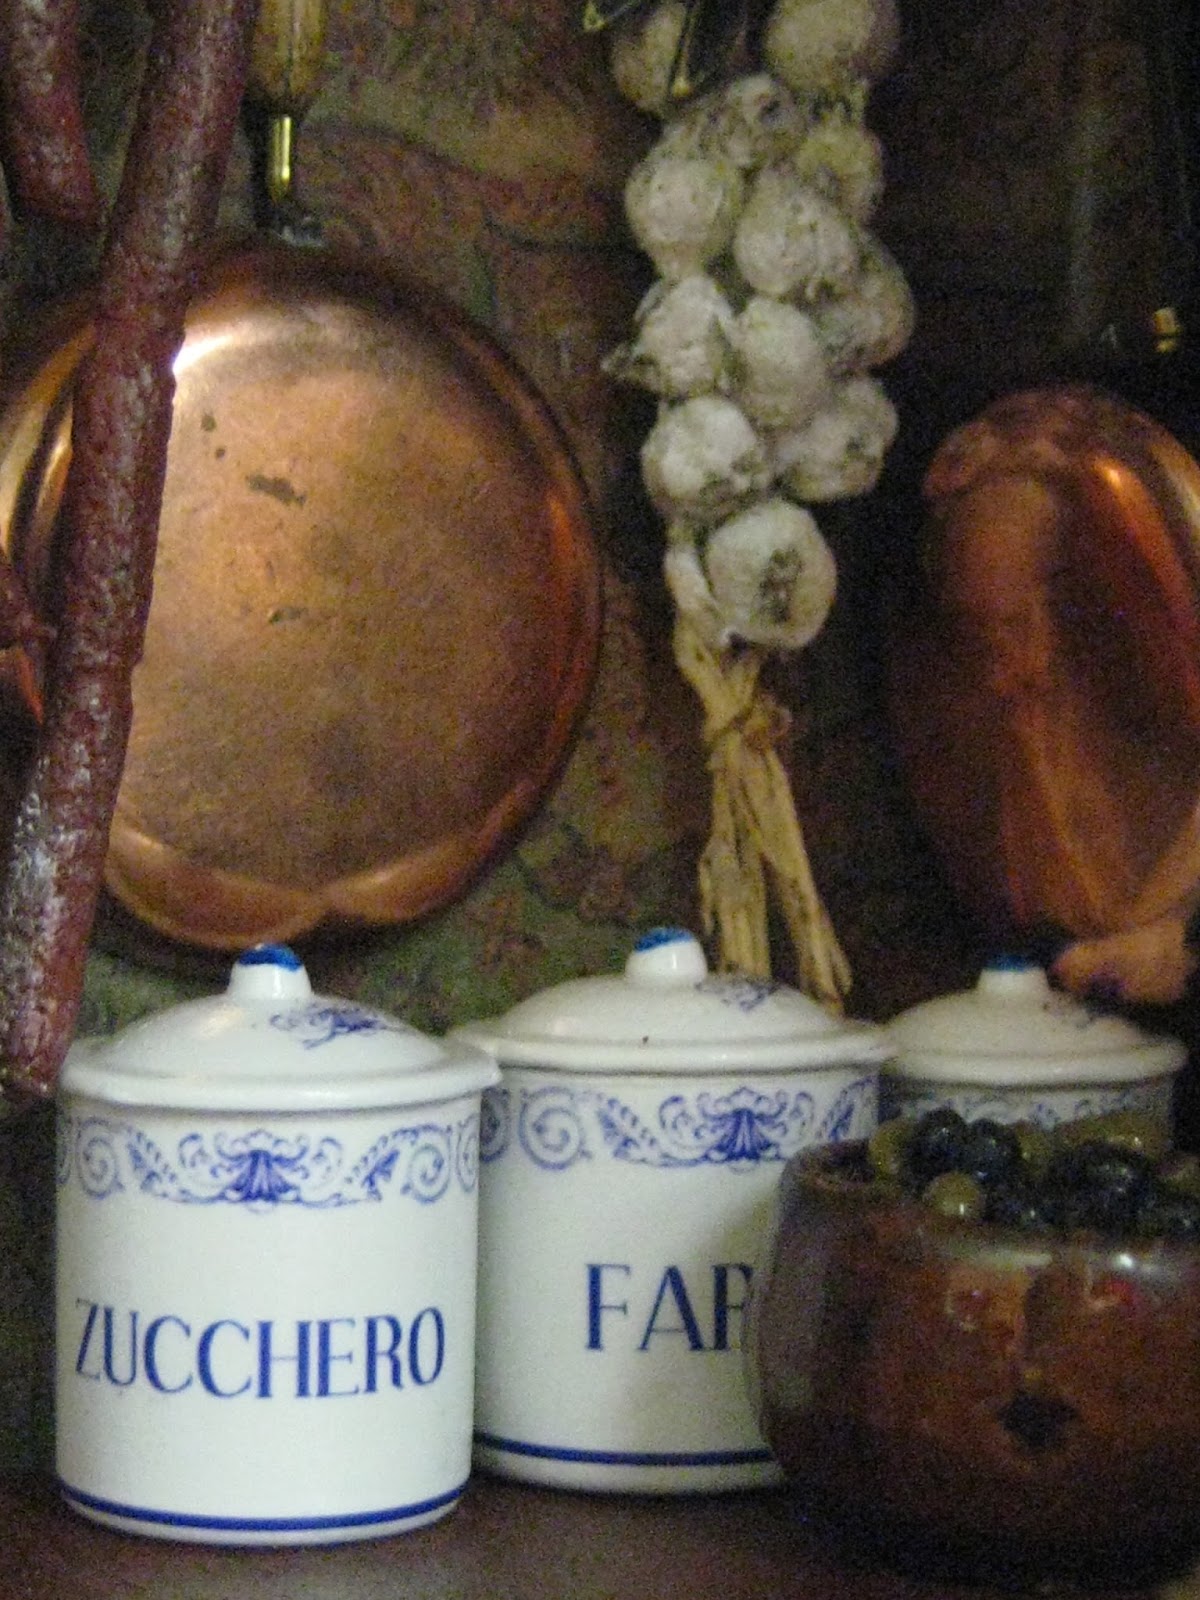 |
 |
| SCORE! I'd found a length of cotton fabric at the thrift store with a tiny stripes of red and green stitched along the edge. How PERFECT is that? |
 | |||
| Sorry for the fuzzy photo, but I wanted to show you the view from the kitchen into the completed and heated Service Hall. The HUGE radiator had been buried in my stash probably purchased from the Seattle Show, and although I was previously unhappy with its bulk, I've gotten used to its super-sized proportions and now I like it. Portia the cat likes it too! She finds it warmer and more comfortable to be sprawled across the window ledge than when she was on the hall table, so she has claimed this room with a view as her own.
*The doll standing at the sink in the photos below is for scale purposes only* the poor dear is in desperate need of some new clothes rather than these "borrowed" ones which were forcibly taken from another dolly! tisk tisk. It appears that she is totally preoccupied at the sink. I wonder what she is up to?  I think she going to rinse those Fimo tomatoes! |

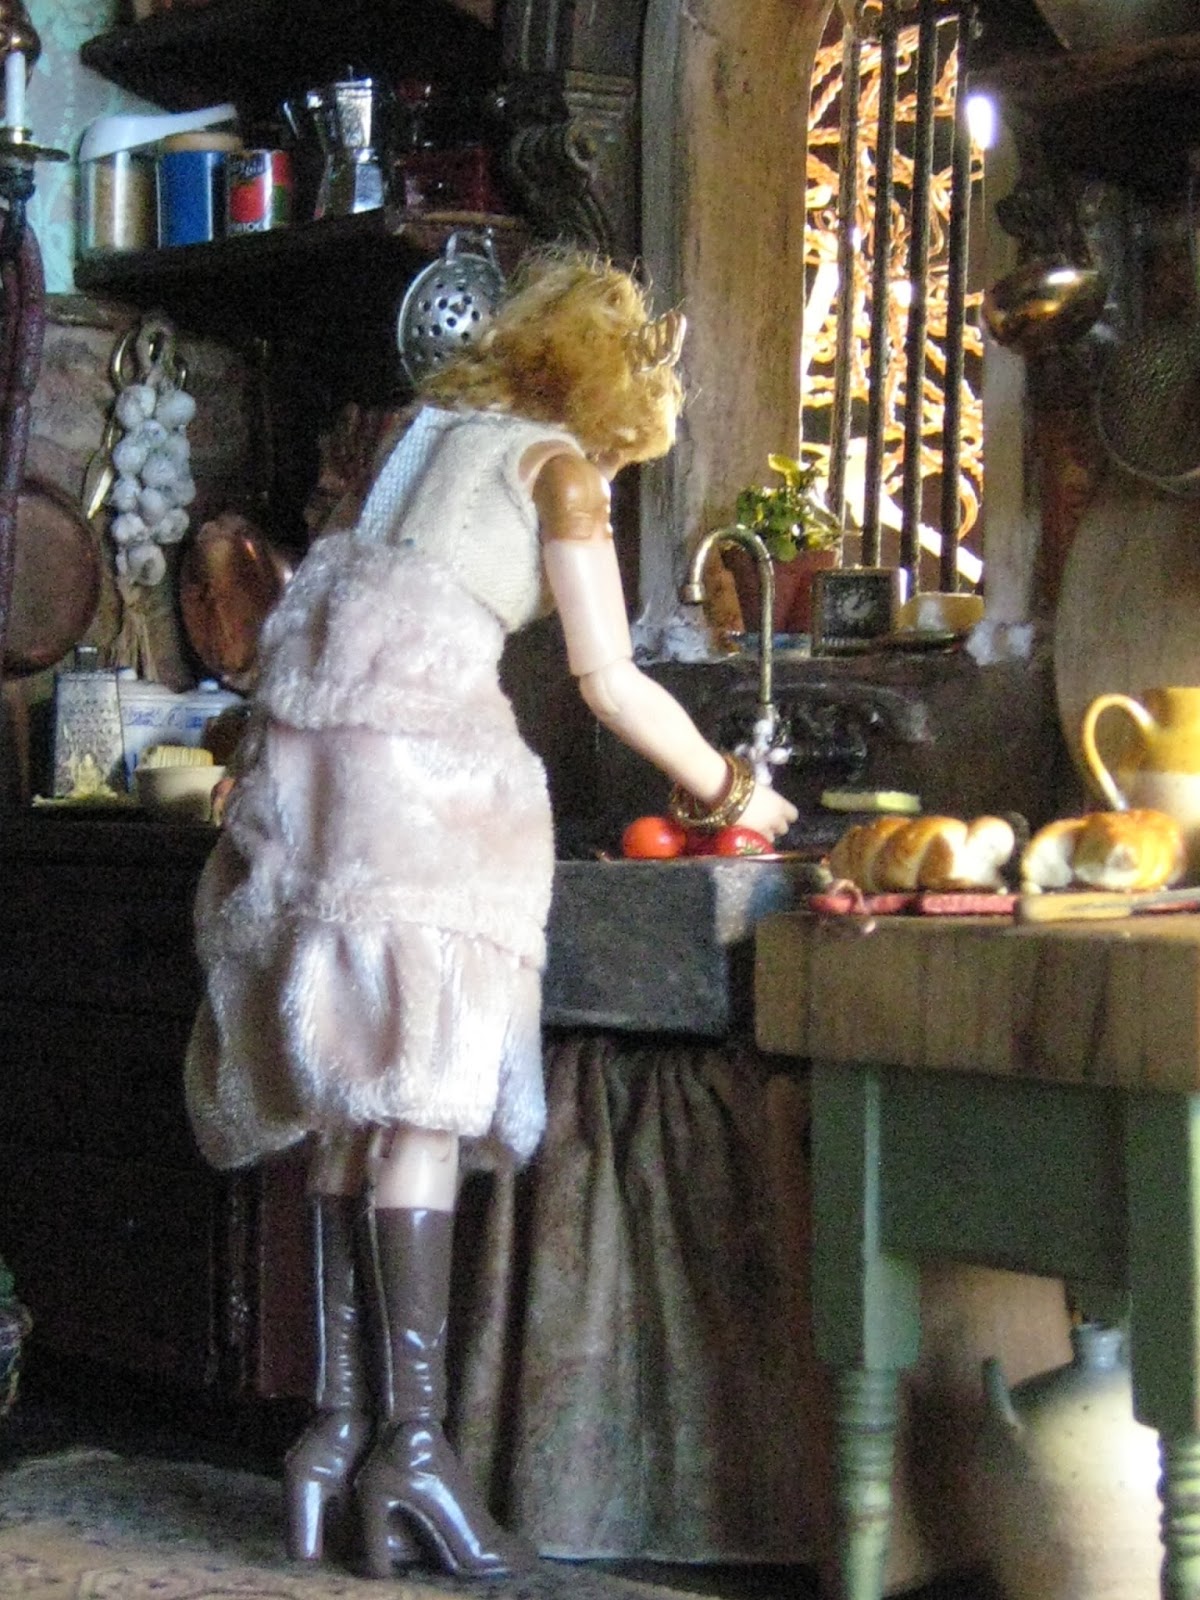
YUP!
she'd best be careful that they don't go tumbling down the drain!

THE STUFF ON THE SHELVES

 |

 |
| Bread and cheeses were both made by me |
PAT RICHMOND of
TWIN HEART MINIATURES
https://www.etsy.com/shop/Twinheartmini
Pat is a regular vendor
at the annual March Seattle Show

The bread is from my special mix of Air Dry Clays
 |
    |

It looks like we have once again
reached the end of another delightful visit.
I really enjoyed showing you
the sink-ing of Villa Leone's kitchen
and I hope you'll return again
for when I get the left side of this kitchen done.
So
until we meet again....
Addio!

And have a Very Merry Christmas
♥Wait just a minute!
there's a
BONUS FEATURE
Villa Leone's new Italian Stove!
 |
JUST ARRIVED TODAY FROM
MOLLY SUE MINIATURES
http://www.mollysueminiatures.com/
hohoho
and a Merry Christmas to ME!
|
♥
elizabeth
.jpg)

